Kohler oriģināls 1039861 skalošanas vārstu komplekts nepabeigts

Brand:Kohler

3.5/5

71.12

PRODUKTA APRAKSTS Aizsargājiet KOHLER produktus, vienmēr meklējiet KOHLER oriģinālo daļu logotipu. KOHLER oriģinālās detaļas ir izstrādājuši KOHLER inženieri, lai saglabātu oriģinālo produkta veiktspēju un veicinātu produkta ilgmūžību. NO RAŽOTĀJA Kohler rezerves daļa; 1039861. Daļas numurs 1039861 ir skalošanas vārstu komplekts. Skalošanas vārstu komplekts Bez apdares Kohler rezerves daļas.

Izgatavots no augstākās kvalitātes materiāliem, lai uzlabotu izturību. Izstrādāts, lai veicinātu produkta ilgmūžību. Rezerves skalošanas vārstu komplekts. Aizsargājiet uz KOHLER produktus, vienmēr meklējiet KOHLER GENUINE PARTS logotipu.
Batteries Included? ‎No
Batteries Required? ‎No
Brand Kohler
Color ‎Unfinished
Country of Origin ‎USA
Customer Reviews 4.5 4.5 out of 5 stars 398 ratings 4.5 out of 5 stars
Domestic Shipping Item can be shipped within U.S.
Included Components ‎Flush Valve Kit
Inlet Connection Type Barb
International Shipping This item can be shipped to select countries outside of the U.S. Learn More
Is Discontinued By Manufacturer ‎No
Item Dimensions LxWxH 10.5 x 8.5 x 4.75 inches
Item model number ‎1039861
Item Package Quantity ‎1
Item Weight ‎3.2 ounces
Manufacturer ‎Kohler
Part Number ‎1039861
Product Dimensions ‎10.5 x 8.5 x 4.75 inches
Size ‎One Size
Style ‎Yes

3.5

10 Review
5 Star
71
4 Star
17
3 Star
5
2 Star
3
1 Star
4

Uzrakstiet savu atsauksmi

Jūsu e-pasts netiks publicēts. Visi obligātie lauki ir atzīmēti ar*

Scritto da: cathammer
Could be better design, but works if you install it carefully
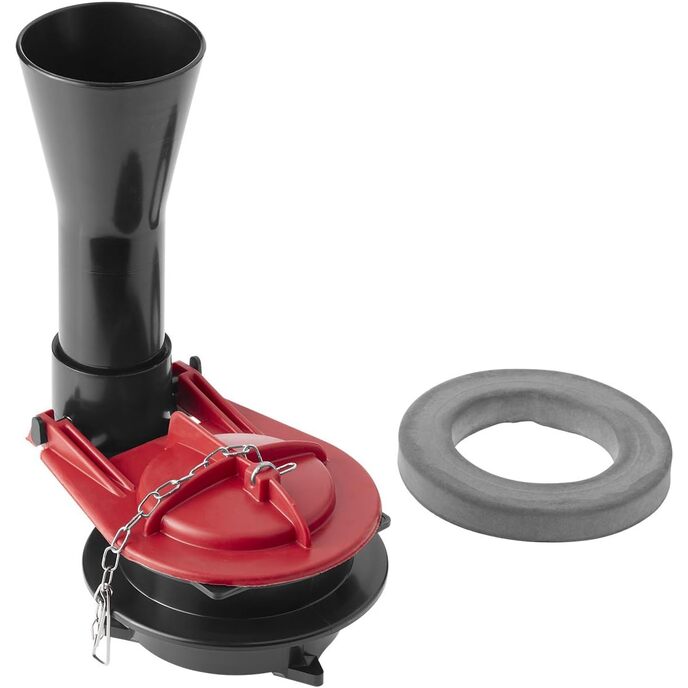
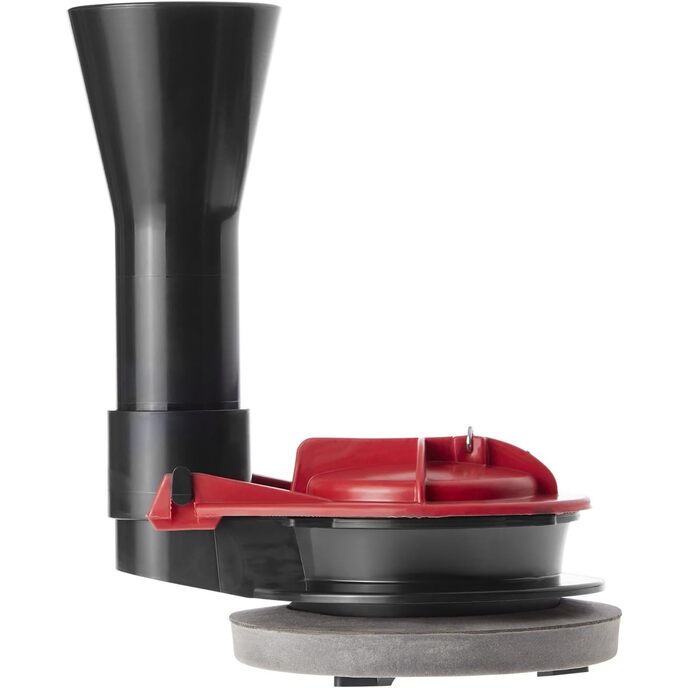
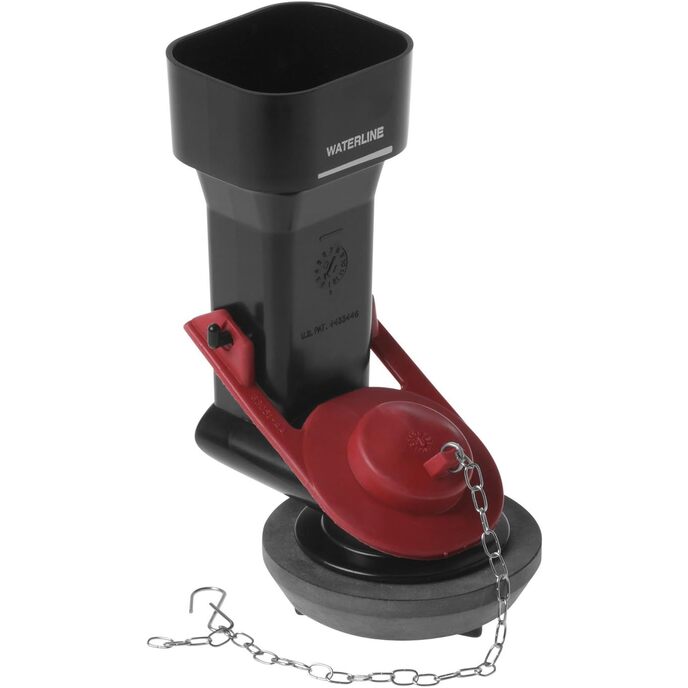
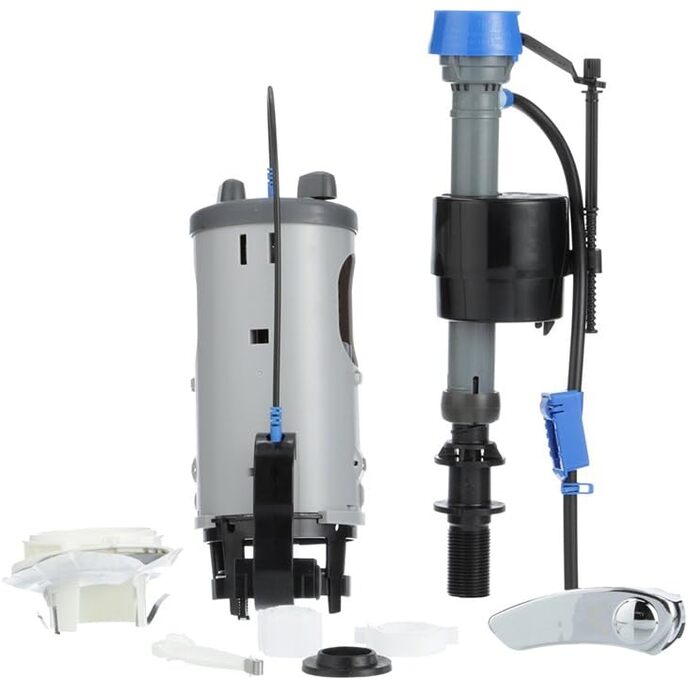
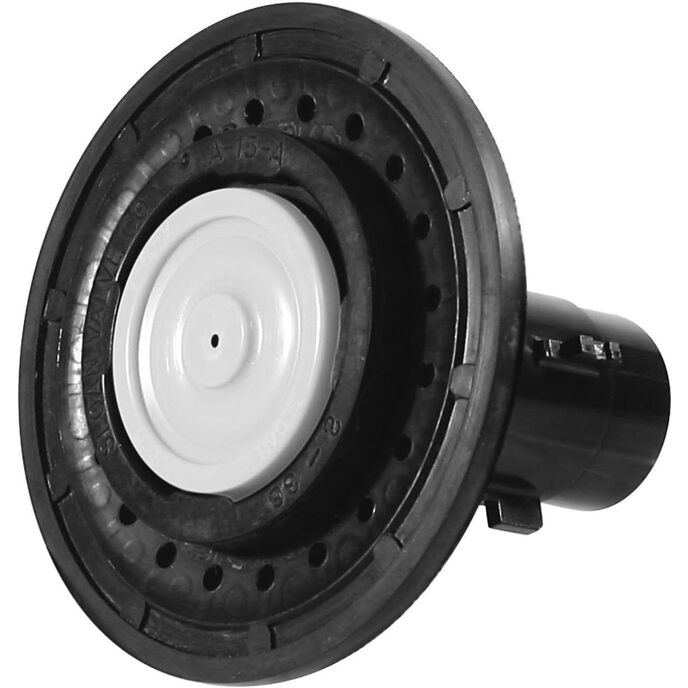
If you have certain Kohler toilets, you have to use this odd proprietary type of flush valve as a replacement. They're made in two heights, so if you have a low-tank toilet, you need the shorter one. If you have the standard-height tank, you need the taller one that has the longer tube extending a few more inches below the flap-valve area. They look exactly the same otherwise, so make sure you get the right one. Either way, be careful while you install it, and use the new gasket that comes with it. The three bottom tabs that lock it to the tank are easy to break off if you don't do things right. I actually broke the one I already had while trying to replace just the gasket and had to buy the whole new valve. Here's what I did: Unhook the tube and chain going to the old valve. Rotate it about 60 degrees (direction doesn't matter) until you feel it release when its tabs line up with the "points" of the triangular opening it fits into. You may have to use downward pressure to get it to move. Use a file or heavy sandpaper with a backing stick to file to a little bit of a slope on the TOP edges of the three tabs on the new valve. This will help to keep it from binding on the under surface of the tank as you twist it into position when installing. Remove the new gasket and flap and liberally grease the tabs, the top and bottom gasket seating area, and the new gasket itself. Don't use petroleum jelly, it can affect some types of synthetic materials, so may not be good for the gasket. Plumber's grease is good, but other slick, but not too thick lubes will work. I used reloading case lube mixed and a water-soluble gel, but even some skin lotions, soap, or dish detergent combos would likely do. Clean the tank bottom where it will sit on the top and underside, and lube it, too. Pencil mark the tank about where the points of the opening are, and far enough out so you can see the marks with the valve in place. Mark the top of the valve gasket flange at the tab locations with something like a silver sharpie, so you can keep track of where the tabs are when you're rotating the valve into place. Determine which tab you will need to insert at which point in the tank bottom to get the flap where you want it after it's turned 60 degrees. Put the gasket back on the valve, and FIRMLY push straight down and rotate it about 60 degrees in the correct direction. Doesn't have to be exact, just use the markings to see that the marks on the valve flange end up about halfway between the markings you made on the tank. It can take some force to compress the gasket (that's why it helps to have the flap removed), so be sure it's compressed enough to turn without stressing the tabs, or you're likely to break off one or more and have to start with a new valve again. Don't wobble it as you work it into place. Reinstall the flap, fill tube, and pull chain.
Scritto da: Amazon Customer
A BEAR to install
Finally got the darn thing installed. After.......... I thought I should have filed a little off the points of the tabs...it would have made it so much easier. I used silicon grease I found at Lowes in a very small tube. Going to order some Sil-Glyde since I have two other Kohler toilets with the same design flapper. I think the Sil-Glyde, together with filing a little off the points of the tabs will make the next installation much easier. I love my Kohler toilets and no matter how difficult this part is to install I do it. I also have the Kohler easy close lids.........they are fantastic. No, I do not work for Kohler, just love quality.
Scritto da: steve l
OEM
First be certain to get the proper replacement valve. Finally got a response from Kohler through a plumbing store with no help from Amazon. This fits a Kohler K-3451 K3453 one oiece toilet. There are no instructions included so the video was helpful for the install. No cutting or filing on any of the three tabs/fins was necessary. Slight difficulty applying pressure and turning valve in the confined space and had to remove the flush handle. Take your time and be careful to not damage the tabs/fins. Moderate difficulty in installing.
Scritto da: Kevin Call
Installs easily
I'm not a real handy person, but this was easy to install and works great.
Scritto da: Richard Goff
Works very well
Fairly wide and was a bit difficult to install in the bowl because it is so small. However once installed works fine.
Scritto da: Donald K.
Works great.... a little adjustment on the fit
Works perfect. Easy way to install. I used silicone lubricate which can be found at pool supply or hardware. Put thin film on all plastic that contacts the rubber seal. Modest amount of downward pressure and it twists easily into position. Before installing, check the fit into the hole without the seal. On mine I had to shorten, sand, the tree points on the bottom a little bit to allow it to drop into the hole.
Scritto da: RS
A bit of a challenge to install
It is hard to imagine what led to the design of the toilet tank or this flush valve. My guess is that Kohler repurposes toilet parts, and as long as they'll fit together, you've got a new model, and as long as the the other parts will fit, no matter how poorly, these are the parts you're stuck with for the life of the toilet. Anybody who has repaired one of these toilets probably has asked themselves, "why on earth would they design it like this?" Good question. But, the repair goes quickly if you read the reviews and the benefit from the experience and the tricks offered by those who have gone boldly before you. Also, there are videos on line. Thirty minutes to an hour later (I did a total rebuild), it looks good as new. No more having someone glare at you in the middle of a movie when dripping water in the toilet begins to compete with the soundtrack.
Scritto da: N. Modonas
Superhuman strength needed.
Give it a dry run without the ring. Figure out which tab goes in last. File, grind, nip, snip, whatever around 1/16 - 1/8" of that tab off. Put that ring back on the base and spray some silicone of equivalent on it, push it in place, then proceed to put every ounch of your weight into your hand while pushing down and twisting. Shipbox design, but with determination it works.
Scritto da: John
Installation
The replacement part is a bit tricky to install. The 3 taps that hold the part in place barely fits through toilet. Some peope breaks the taps. I dry fitted (without gasket) and decided to file 1/8 " of all 3 taps to make install easier. Also added Castille soap to gasket to make the locking 1/4 turn easier. With these steps the installation went smoothly
Scritto da: C.W.Newsham
Very poor product
Not only is it impossible to install without modifying to prevent breaking, but it leaks just as bad as the one I was replacing. Waste of money. Don't buy this.

Saistītie produkti

hot

Atklājiet mūsu starptautisko tīklu

Mēs piegādājam uz 28 valstīm, vairāk nekā 200 000 produktu. Esiet informēts, abonējiet biļetenu.

Array